Thursday, March 6, 2014

Nelle Sew Along Series: Ric Rac Details and Serger-less Seams

Today is Day 4 of the sew along. We have a guest blog post by Lisa of Lemon drop and Lollipops. She does her Nelle without serging the seams and it looks pretty cool. I also love her little ric rac details!


I do my sleeves first and I cut them out a little wider than what the pattern says, because I fold them under twice since I don't have a serger. Fold once, press, then fold again. After they are folded I lay the ric-rac on top and sew it down as I go, sewing the ric rac on and stitching the sleeve at the same time. Do this exact thing to the other sleeve.
 

Attach the sleeves to the front bodice. Now attach to the back bodice and sew the side seams of the bodices. I just do a zig zag to enclose the raw edge. Repeat for the other side. Now onto the bias tape.


 Put that raw edge inside of the bias tape. Sandwich it in there really well. 


I stitch it down on the right side of the dress. Hard to explain, but this helps me keep it looking neater and giving it a good straight line. It puckers a little, but it's not noticeable at all when it's on.


I press the seams towards the sleeves. I think some stitch this part down. I do not. I just eyeball this part. Fold it down and press. Doing the top stitch right around the neck. Now it's ready for the elastic casing to be made.


I must have skipped a picture, but fold a little bit under, press and then sew it down, leaving an opening for the elastic to slide through. Put elastic through, sew it together and then close the opening. The top is done.


Be sure to head over to Lemon drop and Lollipops on Facebook and tell her thanks for this tutorial! Don't forget to share your finished items with the group on FB or with #nellesewalong on Instagram for a chance to win a free Brownie-Goose pattern! 


Wednesday, March 5, 2014

The Nelle Sew Along Series: Twirly Skirt Tutorial

Today is Day THREE in the Nelle Sew Along Series. Today we hop on over to Jenna's blog, Sewing Sunflowers, to see how she turns the Nelle into a twirly skirt complete with a ruffle on the bottom! Get this, she even did all the math for you and tells you what sizes pieces to cut for each size! Click HERE for the link! Be sure to tell her thanks and stay tuned for tomorrow's guest blog post from Lemon drops and Lollipops about using ric rac.

Image from Sewing Sunflowers


Don't forget to start planning your projects for the giveaway! Remember, 3 ways to win with two of them left up to chance! See the first post for all the details and the links. Start hashttagging those Instagram pics! #nellesewalong Happy Sewing!

Tuesday, March 4, 2014

The Nelle Sew Along Series: Perfect Bias Tape

Day two of the Sew Along! Okay, for those who love the look of the bias tape on the arm holes but end up with a hot mess, here's Raedene of Chasing Mermaids with her tried and true bias tape method. P.S. I REALLY want a bias tape machine now! Click here ----> LINK!


Repeat from Yesterday: There are some patterns out there that you never get tired of sewing. The Nelle by Brownie-Goose is one of those for me and everyone contributing to this series. This blog series will cover tips, tricks, and over the top add-ons to this classic pattern. Be sure to stay tuned!

DAY ONE: Bias-Less Arm Holes by Lollipops & Paisley
DAY TWO: Perfect Bias Tape by ChasingMermaids
DAY THREE: Twirly Skirt Tutorial by Sewing Sunflowers
DAY FOUR: Ric Rac Details by Lemon drops and Lollipops
DAY FIVE: Buttons, Pockets, and Flowers, Oh My! by Lollipops & Paisley

Now you make think, why should I bother? Well, here's why, Mother Goose (AKA Amy) is going to offer an incentive to participate in the Sew Along! HAPPY DANCE! So there will be 3 ways to enter. First, just anyone who shares with the Brownie-Goose lovers group on Facebook will get a chance to win a free BG pattern, winner drawn via Random.org. Secondly, we'll have a voting contest on the same FB group for fans choice award, prize is a free BG pattern. Lastly, we'll have an Instagram (because who doesn't love IG?) tag contest for a chance to win the third free BG pattern. Just use #nellesewalong to tag your finished project pics. Each finished project will get an entry and winner drawn via Random.org. The Sew Along Blog Series will run 5 days and then we'll give everyone a week to plan projects, sew them, and then post finished pics in the various places. That means this giveaway will close Sunday night on the 16th. We'll leave voting open on the sewing group for 24hrs and then winners announced on the 18th. Please comment below with any questions!

Monday, March 3, 2014

The Nelle Sew Along Series& Giveaway: Bias-Less Arms Holes

There are some patterns out there that you never get tired of sewing. The Nelle by Brownie-Goose is one of those for me and everyone contributing to this series. This blog series will cover tips, tricks, and over the top add-ons to this classic pattern. Be sure to stay tuned!

DAY ONE: Bias-Less Arm Holes by Lollipops & Paisley
DAY TWO: Perfect Bias Tape by ChasingMermaids
DAY THREE: Twirly Skirt Tutorial by Sewing Sunflowers
DAY FOUR: Ric Rac Details by Lemon drops and Lollipops
DAY FIVE: Buttons, Pockets, and Flowers, Oh My! by Lollipops & Paisley

Now you make think, why should I bother? Well, here's why, Mother Goose (AKA Amy) is going to offer an incentive to participate in the Sew Along! HAPPY DANCE! So there will be 3 ways to enter. First, just anyone who shares with the Brownie-Goose lovers group on Facebook will get a chance to win a free BG pattern, winner drawn via Random.org. Secondly, we'll have a voting contest on the same FB group for fans choice award, prize is a free BG pattern. Lastly, we'll have an Instagram (because who doesn't love IG?) tag contest for a chance to win the third free BG pattern. Just use #nellesewalong to tag your finished project pics. Each finished project will get an entry and winner drawn via Random.org. The Sew Along Blog Series will run 5 days and then we'll give everyone a week to plan projects, sew them, and then post finished pics in the various places. That means this giveaway will close Sunday night on the 16th. We'll leave voting open on the sewing group for 24hrs and then winners announced on the 18th. Please comment below with any questions!

Feel Free to use this button (grab the HTML at the side -----> ) to share on  your own blog or IG or FB or any other place you'd like to show you're joining the fun!


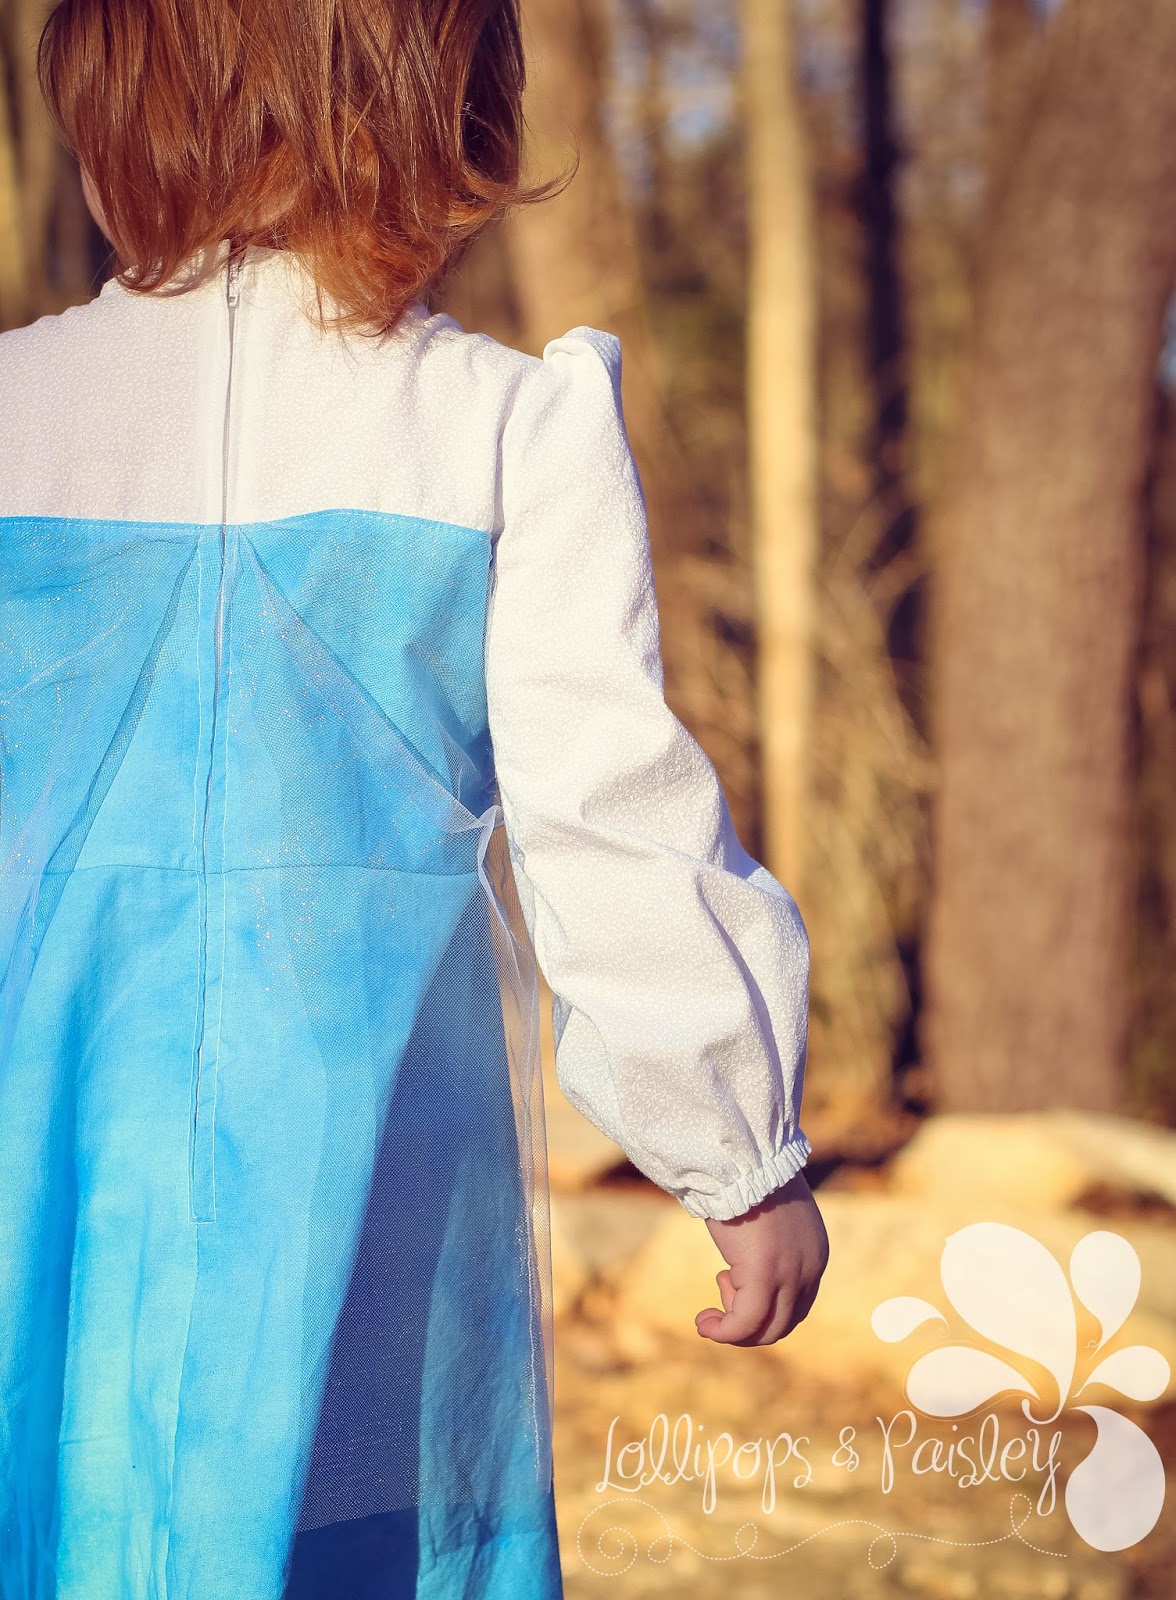
First up, is the the bias-less version of the Nelle. That's right, NO BIAS TAPE! So if you're one of those who have tried the Nelle but wound up with a hot mess on the arm holes, this tutorial is for you!


This version features a fully lined bodice. This fabric (Heather Ross's Crafty Chloe line) was on the thin side. I love the print, but I'm not a fan of see-through on the bodice. So we used the method below to do the bodice. Start by cutting FOUR bodice pieces and not two. I also added 2" to the length of the skirt piece. The sew the arm holes with fabric right sides together. Clip the curves, turn and press. You can do the side seams two different ways. You can follow the rest of the Nelle pattern or you can do them the way you do the side seams in Lazy Susan and have completely enclosed seams on the bodice. That's what I did on this one. I really like it, but I did have to seam the skirt piece first and gather in the round and attach it. That's not as fast as the Nelle version, or it isn't in my opinion. So choose which you want and keep going.


Next we prep are sleeves. I serge the edge, then I fold up the hem a quarter inch, or just a tad more than the serging. To apply the lace, I lay it under the starting edge and position as I sew. I use my topstitching stitching length (3.5 for me here, but sometimes I go up to 4) and go slowly. I don't like pins so I just keep positioning the lace as I round that gentle curve.


To keep straight, I line the edge of my sleeve up with the little edge at the back of my sewing foot. You can kind of sort of see that in the pic below. Follow the edge of the fabric up to the back of the sewing foot and you can see a 'line' on the foot.


I didn't add the second line of stitching that the pattern suggests because I didn't fold up my hem that much. You can add it if you want. Topstitiching always add such detail! I loved this dainty little sleeve as is, so I left it. 

Now on to joining those sleeves to the bodice. Since we're NOT using bias tape, we're going to do a kind of french seam method. Line up the sleeve and the bodice right sides together (shown in first pic), then make sure you move that sleeve over a tad leaving about an eighth or quarter inch of the bodice exposed on the side (shown in top right pic). This will keep your edge from fraying into the inner bodice. Next, we fold that sleeve over and you can sew on or press it down nicely. I did a finger pressing (yes, I just smooth it out with my finger, it works).  


Then, I use the center needle position, my topstitching stitch length and fold of the sleeve as my edge guide to stitch that sleeve in place. You can choose to continue that 1/8th inch topstitch all the way down to the bottom of the sleeve or not. I chose not to because I knew I still had to attach the other sleeve if you think ahead (I wasn't), you could do the first step in attaching the sleeves on all sides and then topstitch them all down nicely with no stops. So, if you do that, make sure you turn the bodice inside out to to make attaching the opposite sleeve easier, as shown below. 


Phew, that just leaves the neckline! Press down as stated in the pattern. Again, I used thin fabric, so I didn't have thicker layers to contend with. However, if you used heavier cottons (say Jennifer Paganelli stuff), you may want to cut your inner lining down about an inch shorter than the outer bodice. This should give you a good scrunch with the elastic but not let the inner lining get skipped when stitching the casing.

 I don't like drawing lines on my pretty fabric... so I use my project for sewing guides. I did my first stitch (the one you leave open on the bottom for the elastic) right on the top of the serging. I just following that all the way around (here's where you want your serged edge to be nice and straight!). Then I place the side of my sewing foot on that first stitching and sew a straight line all the way around (no opening for elastic this time). So even if my first line wasn't perfectly straight, the second line will match it! Be careful, you don't want to slide too close to that first line when you go over those arm seams. It makes it a pain getting that 1/4" elastic through. I'm speaking from experience here... 


Up on the blog tomorrow is Raedene of Chasing Mermaids with her method to apply perfect bias tape. You don't want to miss this one! 


Sunday, March 2, 2014

Hopping Along the Bunny Trail: Easter Pre-Orders

Easter brings fancy clothes and colorful eggs in fun baskets. This dress in its 3 different color schemes is sure to please little girls of all sizes. The colorful polka dots allude to Easter eggs. Yes, I know Easter isn't til April 20th this year, but I had to get stuff ready for you to drool over before then! This season, we have SIBLING SETS! You can purchase separately, but the set will get you 10% off your Easter purchase. Head over to our Etsy Store or Facebook Page to order. Please request a custom listing for your discount.

First up is little sister Jenna in her Easter Princess. This pattern is from Candy Castle Patterns, the Candy Castle Princess Dress. Yellow bodice, green sash, and multi dot full skirt. You can request a shorter skirt if you like, but this full skirt would be perfect with a pettiskirt underneath. And yes, that flower clip is included!


This dress is available in the following sizes and measurements. PLEASE check your measurements against these before ordering.

SIZE Chest (up to) Length (shoulder to hem)
6mo.............18.5".....................18.5"
12mo...........19.7".....................19.5" 
18mo...........20.5" ....................20.5"
2T.................21.3".....................22"
3T.................21.7".....................24.5"
4T.................22.4".....................26"
5yr................23.2".....................27"
6yr................24"........................28"
7yr................24.8".....................29.5"
8yr................26"........................31.5"
9yr................27"........................32"
10yr..............28.3"....................33"


The bodice comes down in a pretty V without exposing too much skin. The sleeves are nice a poofy without restricting movement. The sash is gathered and attached at the side seams to create a pretty ruched look on the front while preventing loss of the sash. 


The back of the dress buttons with coordinating colors and ties in a big bow. Here's a great tip for the bow, lean over and tie it upside down (So instead of having the child turn around and face away from you, have her face you and you lean over her head and tie it or you tie it at her back with you in front then adjust once it's tied.). 


And for the boys... a camel tan linen trouser with coordinating cuffs and bow tie. Okay, you don't have to get the bow tie. I know everyone isn't a fan, but we're big Doctor Who fans in this house and my little boy had to have a bow tie (actually several bow ties!). So I'm listing them separate. If you buy both together, I'll give you a 10% discount. 


With a flat front and wide leg, these pants (pattern by Brownie-Goose) are a classic cut and perfect for Easter. 


The leg cuff features 2 buttons. If you would rather have one of those, tell me when you checkout. 


The Bow Tie can be done in just about any of these fabrics, especially to coordinate with a sibling girl set. 


Remember, this is a pre-order to guarantee you get your items before Easter. All these items will ship on or before April 5th. 


Bow Ties are available in Baby, Child, Youth, and Adult sizes. Shown below, the yellow bow tie is a small and the green is a medium. 


And here is a cute sibling action shot...


Tuesday, February 4, 2014

Who Wants to Win a Serger?

Okay, I'm sharing a giveaway link here for Seamingly Smitten Sewing Patterns. If you sew clothes and don't yet have a serger, get one!!! I love it!


I LOVE my serger and would LOVE to own a second. Yes, I said a second one! WHY? I mean, who on earth needs TWO machines that do the same thing? Well, I do! I want to set one up to do rolled hems and the other to do regular seam finishing. See? I'll use them for DIFFERENT functions. This will save me SO much time in having to change out threads and switching settings, then going back again.

So... I'm entering, are you? http://seaminglysmitten.blogspot.com/2014/02/brother-1034d-serger-giveaway-by.html

Oh, and if you want to see a picture of one of Seamingly Smittens patterns that I've made, here you go! I love this little knot dress!


Saturday, January 18, 2014

Swizzle Sticks Sleeve Add-on

Candy Castle Patterns has done it again! First, let's look at the Princess Dress, which is one of my favorites.


Look at that gorgeous, slim-fitted sleeve. While it is beautiful, it doesn't really fit every body type. Candy Castle Patterns just released a new version of sleeves, yes, multiple sleeves! This new Swizzle Sticks Sleeves pattern will work on both the Candy Castle Princess and the Peppermint Swirl dresses.


I was lucky enough to test one of the options for the new sleeve pattern. I added the short sleeve option without elastic to the Princess dress without the top skirt. This is my daughter's Easter dress!


The sleeve options include a long sleeve with or without a ruffle and with or without shirring (and faux shirring) and then short sleeves with or without elastic. You can mix and match to your heart's content.


I know what you're thinking, $4 for a sleeve add-on? The dress patterns are priced very reasonable at $8 and each of those already has quite a few variations included. The new sleeve pattern adds MANY more options to that! It has it's own drafted, nested pattern pieces. The instructions for each option are so detailed that it would add far too many pages to each pattern to update them both. Candy Castle Patterns put many hours into drafting, designing, photographing, and revising these sleeve options that it's only natural that she would want a small compensation for it. I mean, when we sew an item to sale, we do want to get paid for our time and supplies both, right? Pattern designers only ask the same. So head on over and get your Swizzle Sticks sleeve option!

Monday, January 13, 2014

Frozen Part Two {The Elsa Dress}

My little girl is ALL over the newest Disney princess movie, Frozen. I tested the Anna dress pattern back in December. You can read about it here. Last week, I was honored with the chance to test Elsa in the Everyday Princess line. My little girl was ecstatic! {HAPPY DANCE!}


This pattern is sized for 2-8 years. You can make it with MANY fabrics. I chose cotton wovens for the bodice and skirt then added a glittery tulle overlay for that very Elsa look. You can also use chiffon, satin, silk, sheers and even knit to make this dress!


The dress does have a zipper in the back, but don't let that scare you! She's got a great tip for zippers and it's really very simple to sew. I'd rate this dress as an advanced beginner. You use single fold bias tape for the sleeve casings and he neckline but it's a very simple method.


I was afraid of using a sheer for top bodice. I've sewn with chiffon before and that's a fabric that's I've learned to leave alone. Chiffon and my machines do not get along. However, I did branch out of my little comfort zone and use TULLE for the first time. Yep... my first time. Nope, I've never made a tutu! GASP!


The skirt portion is a circle skirt. If you can get your little girl to twirl (mine would not in the cold temps when we took pics on Sunday), this is a fun dress for it! The overlay comes just short of the bottom of the dress, but you could also cut your dress and your overlay longer if you prefer. You could leave off the overlay if you're afraid it would get in the way!


The dress does have quite a few steps to it but the love and excitement in my little girl's face when she saw the dress makes all those little steps worth it! Cut to finish, I'd say this dress took me no more than three hours. It's currently $7 over at Made for Mermaids on Etsy. Be sure to pick up this pattern so your little princess can add the wonderful Elsa dress to her dress-up trunk! And if you haven't already done so, add Anna to your cart! And if you make doll size dresses... add the dolly version for $2! If you prefer to order one custom made, check out my listing.


Monday, January 6, 2014

Tie Dye Diva Retirement Party!


Okay, Okay, Okay... cool your jets! Jen at Tie Dye Diva is still going to be making new patterns and designs for all of us! But she is retiring 11 patterns. As a big send-off, she's giving you one last chance to buy them all at once at one low price of $15!

So those pants third from the top on the left? I LOVE those! I love them so much that I bought the pattern and have made multiple ones! I have several of the other patterns as well, but those pants are a MUST! They have a skinny tapered leg. They have options for pockets that hide all kinds of treasures. I love the details you can add with bias tape (the pattern includes a tutorial for making your own ON THE BIAS) or ruffles on the pockets. You can add ruffles to the legs. You can make the waistband with contrasting fabric. The possibilities are endless! So here are a few of the Snazzy Pants I've made. 

First, the pants... Both of these were constructed before I started my business, so photography was minimal... this are phone pics pulled from my FB page!


Then there's the shorts... Colin LOVES this style! The pockets are his favorite. He no longer wants pants or shorts without pockets! I love the details you can add with contrasting fabrics! And the pockets only take a little bit!


So head over before the 11th so you can get the 11 pattern bundle for only $15! 

Saturday, January 4, 2014

Skinny Jeans and Titchy Threads!

Back in August, Titchy Threads had a huge sew along for her free Small Fry Skinny Jeans pattern. The pattern only came in size 2T. Ugh. Jenna needs a 3T and she's my smallest. I REALLY wished she could fit her booty into 2T, but she's like her momma and has too much junk in her trunk. I sulked and got over it. I accepted that I'd never be able to sew my kids a pair of Small Fry Skinny Jeans.


But then... CALL FOR TESTERS! Titchy Threads is expanding the available sizes for this pattern! JACKPOT! I wanted skinny jeans for my 5 year old son! He's got skinny legs and not that many jeans in his wardrobe. I got selected! {Insert a happy dance here!}


First of all, sizing on this new pattern is fantastic! It starts at 0-3 months and goes up to 12 years! This pattern is packed with options: full or half fly, adjustable waistband (yes, button hole elastic), detailed top stitching or not, and a version for SHORTS! Summer is coming... shorts season is just around the bend!


My son has several blue denim washes in his pants drawer, so I decided to go with black (also, I already had black stretch denim in my fabric stash). This pattern tapes together beautifully! The pieces are easy to trace and include notches and grain line markings! It's a very professional pattern that both beginners and advanced sewists (I used a fancy word!) alike with enjoy.


One thing to take into account is that this pattern is not a quick sew. The details are simply amazing, but those details take TIME! The pattern comes with multiple options. You can have a full zipper fly or a half fly (mine are the half fly with no zipper). You can add inset pouch pockets with a coin pocket option or you can do front patch pockets like I did. You can do top stitching on the waistband or complete a version without it (I did without for my test pair). It has details and tutorials for flat felled seams and button hole elastic. My son is SKINNY! We don't buy pants off the rack unless they have adjustable waistbands! These pants have the adjustable waistband included! YAY! {Insert another happy dance!}


With this pattern, you can use the solid neutral fabric for the main fabric. It's safe. It matches everything. Then add those pops of color for the contrasting fabrics hidden inside the pockets and the waistband! I decided to add a pop of color with Illustration Ink's Dots in Red designed for Robert Kaufman. It adds a little super hero touch to my little man's wardrobe. You gotta love super hero allusions! You can JUST see the red peeking out from behind those front patch pockets.


 Keep watch for these pants to hit the scene some time this next week! Follow Titchy Threads or sign up to follow me by e-mail over on the right of the screen. ;) Happy Sewing!