Friday, October 18, 2013

Rapunzel: The Everyday Princess Dress

Halloween is JUST around the corner... yes, despite all the Christmas stuff you see in stores,  we still have Halloween up first! My friend Megan, owner of Made for Mermaids, is coming out with her Everyday Princess Dress Collection. Minnie, Cinderella, and now Rapunzel are out in time for quick dresses before Halloween!

I had the pleasure of testing Rapunzel for my baby girl. She LOVES Rapunzel! Her bedding is Rapunzel! So I jumped when when I saw the testing call for this dress!

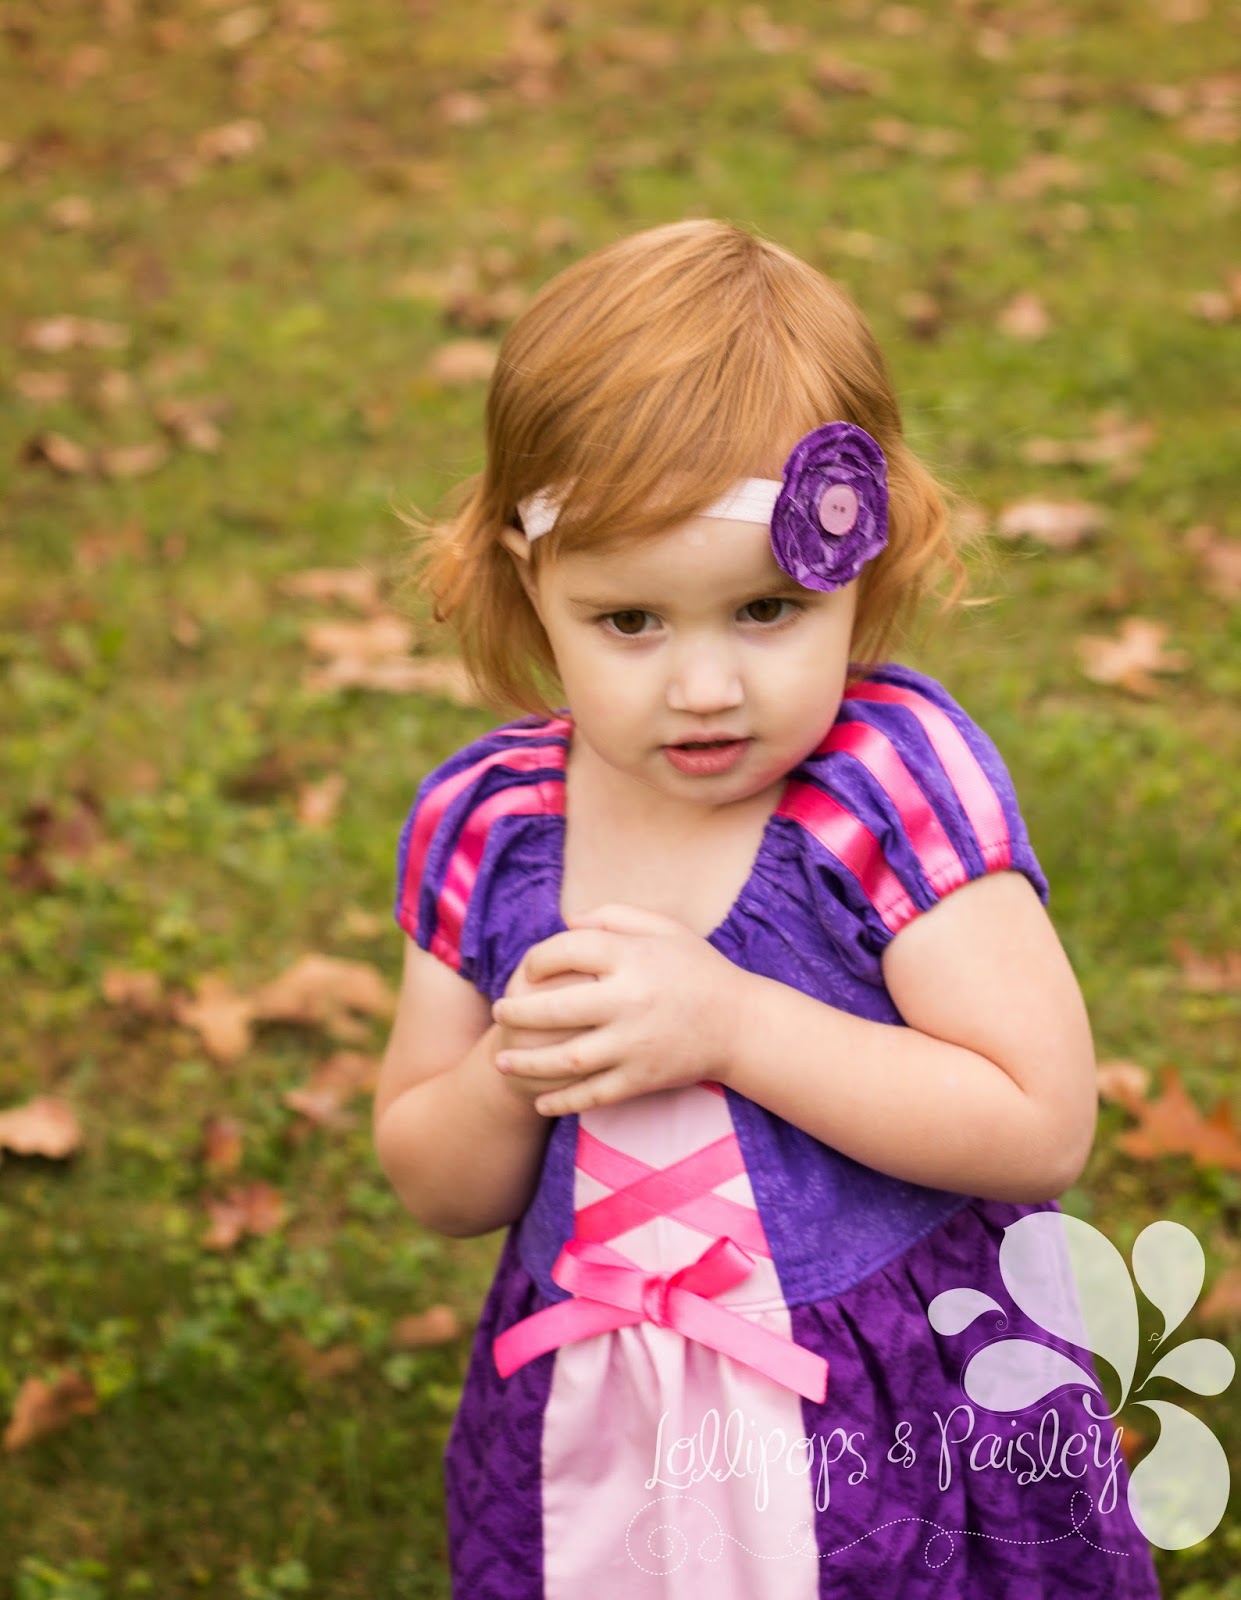
I attempted to sew it up late one night and totally screwed up the center bodice piece placement. I'm still scratching my head over why I thought it looked right before I serged and top stitched... but it was finished before I figured it out! So the bodice insert piece SHOULD be wider at the top and narrower at the bottom to give the illusion of a narrow waist, like the princess. ;)

I plan on making another dress, but I've got to finish up some orders first. It could be the 30th by the time I make her another dress...


This dress pattern prints out very easily! It went together easily and includes pattern pieces for several fabric flowers! The tutorial is full of pictures illustrating every step of the way! She even added extra wording to ensure that you won't make my mistake as easily as I did (meaning it's even more difficult to NOT recognize that you're putting a piece in upside down!).


The tutorial shows you exactly how to do those pretty little sleeve and bodice details. It also discusses elastic and how to judge what you're using and if you should make adjustments to the suggested lengths based on the type of elastic you're using.


Let's talk headbands... This one comes with tutorials for 2 types of flowers AND the measurements for headbands! SWEET! I add my flowers to a clip and add a loop to the headband so you can clip any hair bow to it.


This dress is constructed from 100% cotton fabrics so will last far longer than those store-bought costumes that are really only meant for a few hours of use on Halloween night before they fall apart. MY plan is to sew up all the Everyday Princess Dresses, add them to a trunk, and give it to her as a Christmas present. She LOVES to dress up! This way she can play dress up all year long and I don't have to continue replacing or repairing flimsy store-bought dresses!


So run over and grab the Rapunzel pattern before Tuesday while it's on sale for only $4!! Then favorite Made for Mermaids so you catch all her future Everyday Princess dresses as well! 


Saturday, October 12, 2013

The Lacy Slope Hooded Shirt Pattern Add-on

I rarely get to sew for my oldest daughter. She's 14 and wears women's size XS/SM. When GreenStyle Creations started calling for testers for a hood and sleeve add-on to the Lacy Slope Tank, I jumped! This was exactly the style my oldest loves. She was very excited when I got selected to test!

This shirt can be sewn in many fabrics, but my daughter dove into my stash and came with this stripe from Riley Blake. Then I hit print on the pattern and started cutting out pieces. Everything but the cuff extensions is included in the printed pieces. There's a chart for the cuffs early in the pattern. These pieces went together very well. The hood can be constructed with a french seam or a regular seam. I chose a french seam. Confession: It was my first time! The directions are very easy to follow. This shirt was very quickly to assemble! I used a stretch stitch and my serger for everything except the top stitching. However, if using a knit with some spandex in it, you could construct this top without a serger! What a bonus for those without one (I didn't have one for years!).

Without further adieu...

Notice the wide neckline. My daughter LOVES that feature. The hood is very generous and works perfectly with her very thick hair. She even tried it on last night with a sock bun hair style and it still fit!


Now check out those thumb holes! My daughter LOVES her fingerless gloves but doesn't wear them until much later, like deep into winter! This style is perfect! Since the cuff is just two layers of knit, it's not too hot but still keeps palms warm for these cooler fall mornings when she's waiting to catch the bus. 


Check out that slope! This top, just like the tank since it is an add-on to the tank pattern, is higher in the front and lower in the back. Again, my daughter LOVES this feature! And yes, you can see her cami  peeking out underneath. She wears camis with everything. Everything. So that's why I made this just a little big. She could probably wear an XS in this pattern, but she wanted to layer it and she prefers looser fitting clothes. This pattern comes in 3 lengths. This is the shortest. 


So hood up or down, it's a cute top! I want one! Oh, and she had SO much fun with this photo shoot... she gives this top a thumbs up!


Now that you LOVE this top on my gorgeous little Morgan, go get yourself one! If you already have the tank pattern, grab the add-on to make this shirt. If you don't have the tank, this shirt is available by itself! Click HERE! There's no need to buy 2 patterns! YAY! 

The Lacy Slope Hooded T-Shirt is now Available on GreenStyle Creations's website. It's available in sizes XS through 3XL! The full pattern includes the Hooded T-Shirt and the original Tank Top. The Add-On Pack is just the Pattern pieces for the sleeve and hood and the instructions for the the T-Shirt. Get them now while they are on sale! HURRY! This just listed sale won't last long!


Tuesday, October 1, 2013

Re-purposing Feet

Let's talk about top stitching. It really helps finish off a garment and give it that professional look. If you're like me, you sweat over top stitching. You go really slow so you can keep everything lined up nicely. A few months ago, someone mentioned that they use an edge foot (or something like that, but that's what I remembered later when I was sewing) and it made things so much faster. So when I was working on top stitching later that week, I thought, "I bet something in that bag of feet that came with my machine is an edge foot!"

Did I LOOK at my book? Nope. I looked at my feet. The first one I picked up was my G foot. I have a Brother CS6000i machine. So this is the foot I found...

 I took one look at it and thought it would be perfect for staying next to that hem and top stitching... So I snapped it on and tried it out. This is now how I use it! I know, I know, I know... (Or more like I know NOW!) it's an overcasting foot! If I didn't have a serger, I might know that! But since I have a serger, I've never needed to know how to 'serge' the edges using my sewing machine. So this is how I use the G foot.
But sometimes, I need to top stitch fabrics that aren't always flat on both sides like the above piece. Ruffles are NOT flat. I was using my  foot for ruffles and it was going slower than it was when I was using my regular foot. The ruffles or gathers would bunch up and I would have to stop and straighten them out. So I went back to my little bag of sewing feet. Did I look at my book? Nope. I used my eyes. This is what I came up with.

This is the R Brother foot. It's a blind stitch foot. I can't find one on Amazon to link over here, but it came with my machine. Check your bag of goodies! Anyway, the blade sits in the ditch and keeps my nice ruffles from bunching up like it did on the end of that overcasting foot. This is what it looks like when I top stitch with gathers. This was the bodice of a full twirl top (Lazy Susan by Brownie Goose).
You can barely see the blade here, but it makes top stitching SO much faster and keeps my machine nicely in line. I like taking the stress out of my top stitching! I still sweat over it, but not nearly as much!